
Previamente en Eureka!
Previously in Eureka!
Hola a todos!
Hi all!
Como ya sabeis, ya teniamos nuestra base desertica preparada. Ahora toca pintar el tau de 56mm para terminar el trabajo. Sigue nuestro articulo si quieres ver como lo hemos conseguido!
As you know, we already have a desertic base ready and painted. Now it's time to paint the 56mm tau to finish the work. Follow our article to discover how we have painted it!


Es hora de pintar nuestro protagonista. Vigila el horizonte tras la dura batalla sin sospechar que el enemigo aun les persigue por las entrañas del planeta!
Is time to paint our hero. He is watching the horizon after the battle without knowing that the enemy is following him from inside the planet!
Primero preparamos la miniatura usando imprimacion de citadel y damos base de Marron Chocolate a las partes de tela de la armadura:
First of all, we prepare the miniature using citadel primer and also gives a chocolate brown from vallejo to the cloths parts of the armor:


Despues vamos a aplicar una capa base de TAU light ocre de citadel con aerógrafo a la miniatura. Utilizaremos para las luces carne dorada, amarillo desierto y beige. Para las sombras utilizamos marron rojizo de vallejo, caoba de model air y purpura hechicero de Game Air.
After we are going to apply a first base layer of tau light ocre from citadel using the airbrush. For the lights we will gradually ad sunny skin tone, desert yellow and beige. For the shadows, we will add reddish brown, mahagony from Model Air and hexed lichen from Game Air:


Añadimos las luces:
Then we add lights:


Ahora vamos añadiendo caoba y marron rojizo a la mezcla base de tau ocre y aplicamos sombras apuntando desde abajo:
Now we add some mahagony to the initial mix of ocre tau and we apply the shadows from below:


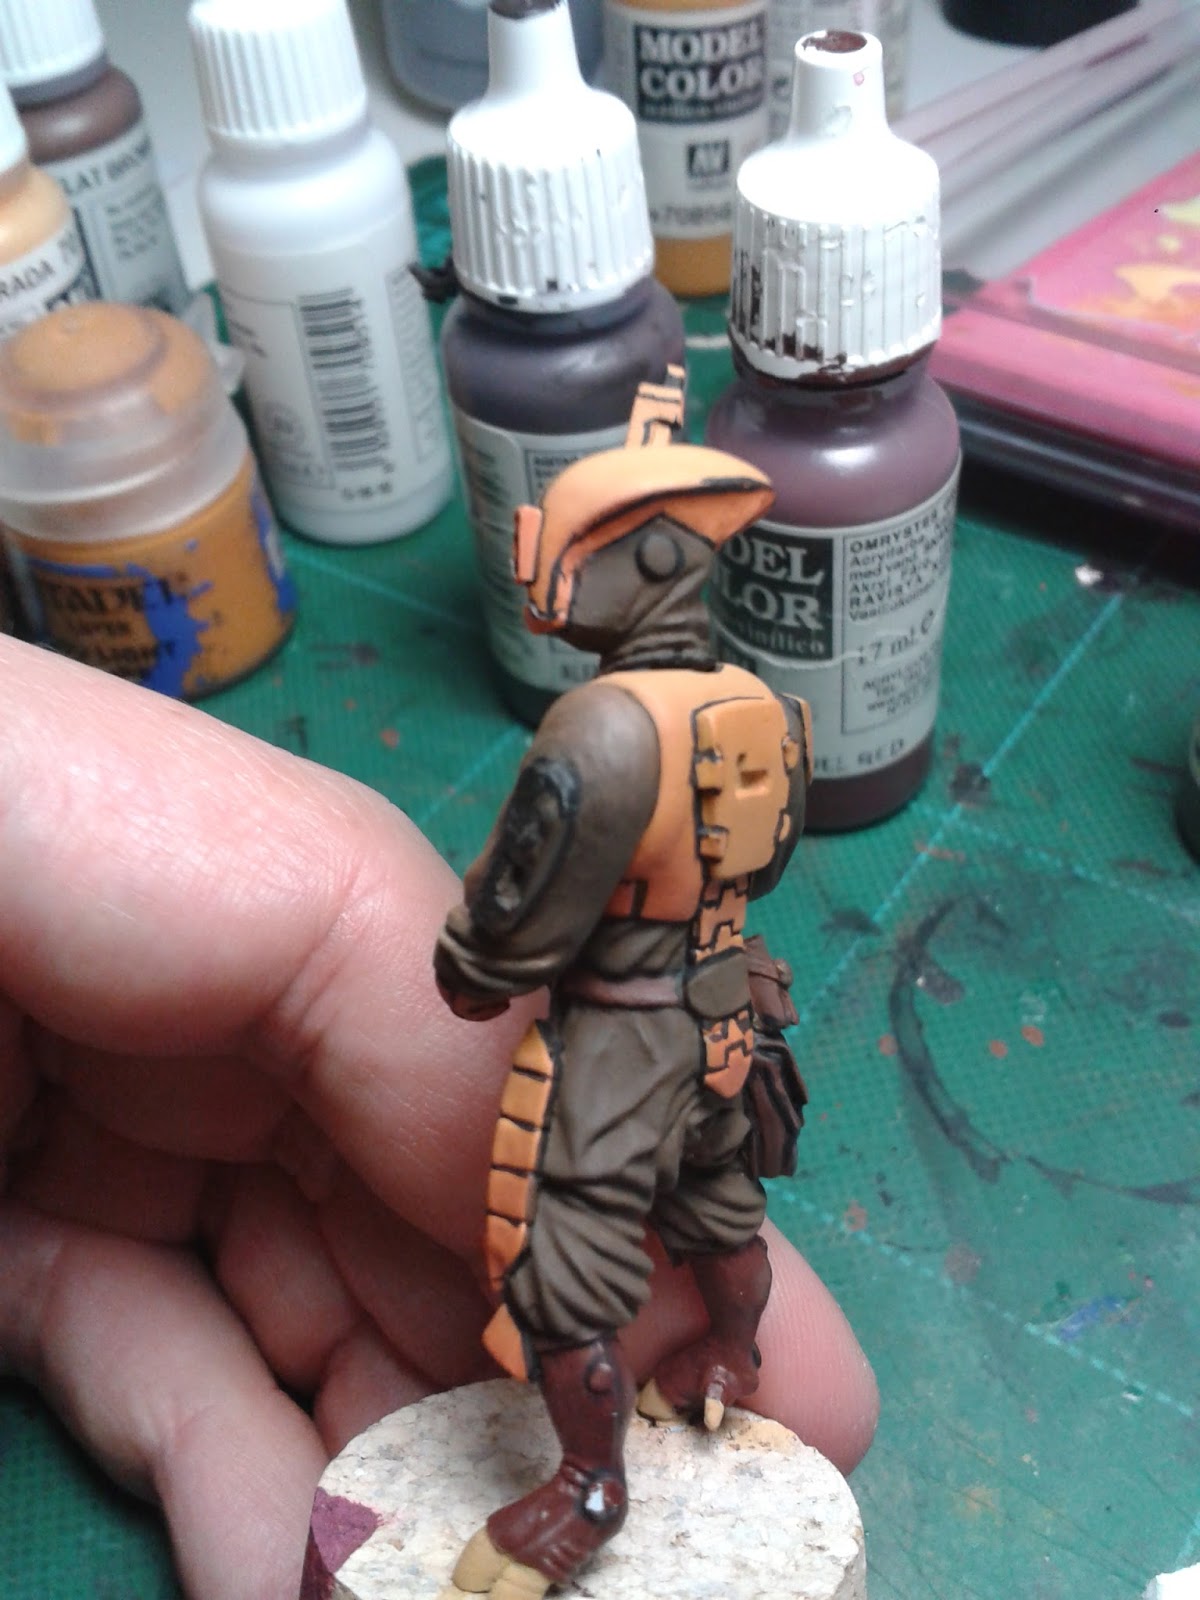
Ya tenemos un degradado general que nos servirá como referencia para luego retocar con el pincel. Utilizando los mismos colores, pintamos los pequeños elementos auxiliares (mochila, hombrera, arma). Es importante perfilar todo correctamente para que todas las partes destaquen correctamente.
Now we have a general degree in the miniature that will help us in the normal brush painting phase. Using the same colors, we have painted the other aux elements as the back bag, the weapon and the shoulder pad. Is very important to outline everything for improve each shape of the miniature.


Comenamos pintando las telas de la miniatura, esto es ,los brazos, las piernas y la parte del cuello. La base se ha realizado utilizando un marron chocolate, las sombras se han hecho añadiendo purpura hechicero a la mezcla y un poco de negro en algunas zonas, y las luces se han hecho añadiendo marron beige a la mezcla y beige al final para las partes de luz maxima.
We start painting the cloths parts of the miniature, this is, the arms, the legs and the neck part. The base is a Chocolate brown, the shadows are done adding hexed Lichen to the mix and a bit of black if needed, and the lights are done adding beige brown to the mix and beige for the lightest parts and the outline.


Para la mochila utilizamos marron rojo para la base y marron cuero para dar luces, añadiendo algo de carne dorada y beige para las partes mas luminosas. Para las sombras añadimos purpura hechicero.
For the bag we used red brown for the base and leather brown for the lights, adding some sunny skin tone and beige to the mix for the lightest zones. For the shadows we use hexed liched.


Empezamos con las placas de la armadura. Para esta parte es sencillo ya que utilizaremos el tau light ocre como base, luces añadiendo sunny skin tone y beige, y para las sombras, añadimos mahagony (caoba) y purpura hechicero. Es muy importante perfilar en luz con beige o casi blanco dependiendo de la zona la separacion entre placas para que destaquen.
We start with the plates of the armor. For this part is very simple that we will use tau light ocre as a base, lights adding sunny skin tone and beige, and for the shadows add mahagony and hexed lichen to the mix. Is very important outline correctly all the plates to improve the sepparation between them.


Añadimos el arma a la figura y ya podemos pintar el resto de la armadura.
We add the weapon to the miniature and we can paint the rest of the miniature.


Añadimos unas pequeñas joyas a la figura con turquesa y damos un barniz brillo al elemento. Despues usamos glossy efecto para que parezca una joya autentica.
We add some little jewels to the miniature using turquoise and adding glossy varnish to the element. After this we used glossy effect to give a more realistic effect.


Añadimos unos elementos turquesa de adorno en hombreras y arma para darle mas identidad a la miniatura. Despues añadimos los desgastes finales a la armadura para que parezca que ha comatido recientemente.
We add some turquoise elements to the shoulder pads and to the weapong to give more personality to the miniature. After this we add some weathering effects to all the armor for a more realistic effect.


Asi que tenemos la miniatura terminada! es momento para unirla a la base y tomar fotografias finales:
So the miniature is finished! time to add it to the base and take final pictures:


Podeis votarla si os gusta aqui:
You can vote here if you like it:
http://www.puttyandpaint.com/projects/9240
Nos vemos!
See you!
Bijou
Preciosa esa mini!! Un tono complicado y con muchas aristas! Mil gracias por el paso a paso, tomamos nota!
ResponderEliminarGracias Toñete! en leganes estara para verlo en vivo! :)
EliminarI have several boxes of the Tau Warriors and I wondering if it possible to do one of each caste is this possible at all ?
ResponderEliminarDo you mean you can paint one of each caste? or me? my mail is sergiotorregimeno@hotmail.com if you want to talk with me about a work :)
Eliminar